1、值类型与引用类型
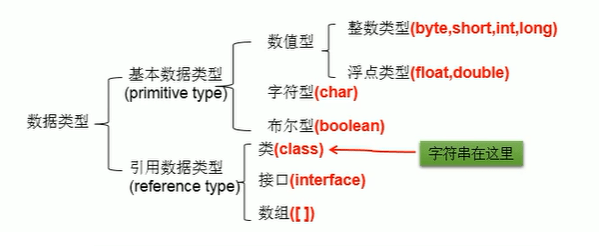
引用类型补充:类、接口、数组、注解、枚举
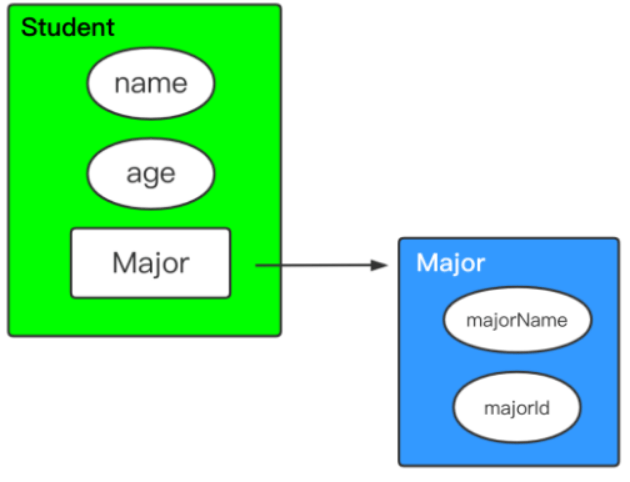
定义两个类:
// 学生的所学专业
public class Major {
    private String majorName; // 专业名称
    private long majorId;     // 专业代号

    // ... 其他省略 ...
}
// 学生
public class Student {
private String name; // 姓名
private int age; // 年龄
private Major major; // 所学专业
// ... 其他省略 ...
}
2.赋值 vs 浅拷贝 vs 深拷贝
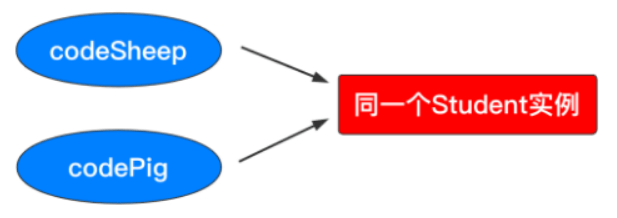
2.1 对象赋值
Student codeSheep = new Student();
Student codePig = codeSheep;
严格来说,这种不能算是对象拷贝,因为拷贝的仅仅只是引用关系,并没有生成新的实际对象:
2.2 浅拷贝
我们试图通过studen1实例,拷贝得到student2,如果是浅拷贝这种方式,大致模型可以示意成如下所示的样子:
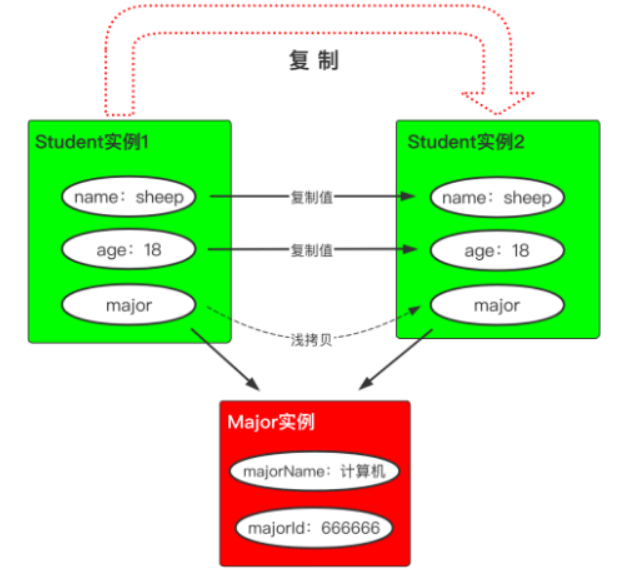
值类型的字段会复制一份,而引用类型的字段拷贝的仅仅是引用地址,而该引用地址指向的实际对象空间其实只有一份。
浅拷贝代码实现
浅拷贝的典型实现方式是:让被复制对象的类实现Cloneable接口,并重写clone()方法即可。
public class Student implements Cloneable {

    private String name;  // 姓名
    private int age;      // 年龄
    private Major major;  // 所学专业

    @Override
    public Object clone() throws CloneNotSupportedException {
        return super.clone();
    }
    // ... 其他省略 ...
}
测试代码:
public class Test {

    public static void main(String[] args) throws CloneNotSupportedException {

        Major m = new Major("计算机科学与技术",666666);
        Student student1 = new Student( "CodeSheep", 18, m );

        // 由 student1 拷贝得到 student2
        Student student2 = (Student) student1.clone();

        System.out.println( student1 == student2 );
        System.out.println( student1 );
        System.out.println( student2 );
        System.out.println( "\n" );

        // 修改student1的值类型字段
        student1.setAge( 35 );

        // 修改student1的引用类型字段
        m.setMajorName( "电子信息工程" );
        m.setMajorId( 888888 );

        System.out.println( student1 );
        System.out.println( student2 );

    }
}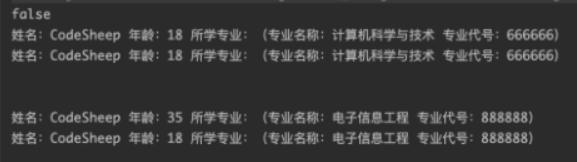
从结果可以看出:
student1==student2打印false,说明clone()方法的确克隆出了一个新对象;- 修改值类型字段并不影响克隆出来的新对象,符合预期;
- 而修改了
student1内部的引用对象,克隆对象student2也受到了波及,说明内部还是关联在一起的
2.3 深拷贝代码实现
虽然clone()方法可以完成对象的拷贝工作,但是注意:clone()方法默认是浅拷贝行为,就像上面的例子一样。若想实现深拷贝需覆写 clone()方法实现引用对象的深度遍历式拷贝,进行地毯式搜索。
所以对于上面的例子,如果想实现深拷贝,首先需要对更深一层次的引用类Major做改造,让其也实现Cloneable接口并重写clone()方法:
public class Major implements Cloneable {

    @Override
    protected Object clone() throws CloneNotSupportedException {
        return super.clone();
    }
    // ... 其他省略 ...
}其次我们还需要在顶层的调用类中重写clone方法,来调用引用类型字段的clone()方法实现深度拷贝,对应到本文那就是Student类:
public class Student implements Cloneable {
@Override
public Object clone() throws CloneNotSupportedException {
Student student = (Student) super.clone();
student.major = (Major) major.clone(); // 重要!!!
return student;
}
// ... 其他省略 ...
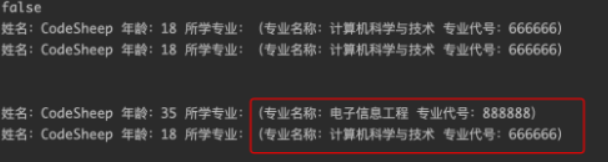
}测试用例不变,运行可得结果:

很明显,这时候student1和student2两个对象就完全独立了,不受互相的干扰。
2.4 利用反序列化实现深拷贝
我们这里改造一下Student类,让其clone()方法通过序列化和反序列化的方式来生成一个原对象的深拷贝副本:
public class Student implements Serializable {

    private String name;  // 姓名
    private int age;      // 年龄
    private Major major;  // 所学专业

    public Student clone() {
        try {
            // 将对象本身序列化到字节流
            ByteArrayOutputStream byteArrayOutputStream = new ByteArrayOutputStream();
            ObjectOutputStream objectOutputStream =
                    new ObjectOutputStream( byteArrayOutputStream );
            objectOutputStream.writeObject( this );

            // 再将字节流通过反序列化方式得到对象副本
            ObjectInputStream objectInputStream =
                    new ObjectInputStream( new ByteArrayInputStream( byteArrayOutputStream.toByteArray() ) );
            return (Student) objectInputStream.readObject();

        } catch (IOException e) {
            e.printStackTrace();
        } catch (ClassNotFoundException e) {
            e.printStackTrace();
        }

        return null;
    }

    // ... 其他省略 ...
}当然这种情况下要求被引用的子类(比如这里的Major类)也必须是可以序列化的,即实现了Serializable接口:
public class Major implements Serializable {

  // ... 其他省略 ...

}
测试用例完全不变,直接运行,也可以得到如下结果:
很明显,这时候student1和student2两个对象也是完全独立的,不受互相的干扰,深拷贝完成。
简言之,浅拷贝就是复制一段关系,例如电脑桌面快捷方式,深拷贝就是直接复制一个对象,例如复制的文件副本。
Click here to view the copyright notice of this site(点击此处查看本站版权声明)
必须 注册 为本站用户, 登录 后才可以发表评论!